
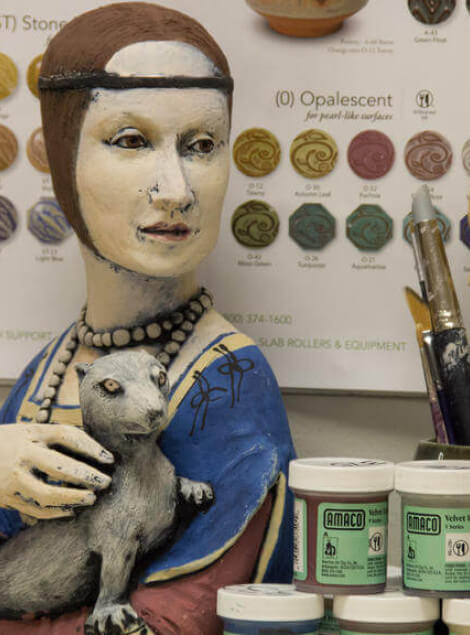
Making the Figure in Clay

Building a ceramic figure with the intention of firing it is different, and tricky. This video series details how to build a hollow figure in clay, using an interpretation of daVinci's Lady with Ermine. Each video shows a particular part of building a hollow figure, the series can be viewed together or individually. New videos will be released every two weeks, so stay tuned for updates!
Supplies
- Fettling Knife
- Scoring Tool
- Off-White Sculpture/Raku Clay No.27
Starting the Hollow Figure
Slab construction is the fastest way to build a figure, but any method will work. I always start with a slab base: it gives extra weight and stability, and reduces the risk of the sides cracking in firing. I cut a hole in the center to ensure that air isn’t trapped inside.
Score and spray all joins, adding a coil of clay in the seam if needed.
The front part of the slab base is for the arms. The body is built straight up and the arms added later onto the base. This gives the body some support structure.
Using slabs about ½ to ¾ inch thick will be strong enough for small to medium sized pieces, allowing some manipulation without being too thin. Clays with more grog, like the 27M that I use here, can be used thicker due to the large amount of grog, or fired clay bits. The grog makes the clay dry and fire more easily.
Keep the walls of your figure as even thickness as possible, to ensure even drying.
Build the shoulders as rounded slabs and stop at the neck.
The most common problem in figures is the neck and head collapsing down into the chest. I avoid this problem by putting a slab of clay, maybe 2 to 4 inches wide and ¾ inch thick, from the front of the throat to the back. This truss helps by spreading the weight load from the chest to the back. Once that is in place, allow the neck and torso to firm up overnight with a small strip of plastic covering the place to add clay for the chin and head.
Making the Arms
While the neck truss sets up work on the arms.
When adding arms, or any other extensions, always remember to cut a hole to let air circulate between the interior parts. Forgetting to cut openings can result in cracking in firing.
Connect slabs for arms to the body and base by scoring and slipping. Make the arms the basic shape of the sleeve. Don’t be afraid to cut into the slabs to alter the form. Here, I cut away a section to improve the shape of the sleeved arm. Paddling lightly with a wooden paddle can also help to reshape a form.
I make the forearm hollow and set it aside while I work on the animal.
Making the Animal
Before adding the forearm and hand, make the ermine.
Ermine is another name for a stoat, a variety of weasel, in its winter coat. In Europe the ermine represented purity and royalty. The fur of the ermine, white with a black-tipped tail, was used on the garments of kings, especially collars and cuffs.
Make the body of the ermine from a slab. Here I curl the slab but don’t close it all the way to keep from adding too much clay in one area. To make the body as sinuous as it appears in the painting, stretch and curve the slab. Cut a hole into the woman's torso and attach the ermine securely.
Coil build the neck up from the ermine’s body. I paddle lightly to shape the animal’s body.
Make the head as a pinch pot. Hold the head where it needs to go to see how the neck should be made.
Make the legs, including the toes, separately and attach to body and the woman's arm. Legs are solid, since they are less than 1” thick, and attached securely.
Use a wood tool to shape the ermine’s features, and a toothed scraper or scoring tool on the body to suggest the texture of fur.
Making the Hands
Once the animal is complete, it’s time to return to the forearm and hand.
Make the hand before adding it to the sculpture. For smaller than life-size hands, use a slab or clay and cut for the fingers. Gently pinch and stretch the fingers to the right size. The thumb can be made at the same time or added separately. Draw a line across the back of the hand for the knuckles. Use a wood tool to give the subtle hint of the fingernails and make the gap between fingers.
Use a stylus to draw the creases on the palm and fingers. If you need to add more clay for fingers, add it on a diagonal, to give a lot of surface area for attaching. For life-size or larger it may be necessary to make a hollow hand, either with slab or pinch method. Add clay for fingers with as much overlap onto the hands as possible for secure joins.
Be patient with making a hand. Use your own hand as a model. Hold the hand up to where it will be going for scale.
Once the hand is complete, score and slip onto the arm or sleeve. Don’t forget to score and slip fingers onto whatever they are touching.
Allow hands to dry slower than the rest of your sculpture. Wrap with plastic and uncover last. The slower the hands dry the less risk of cracking and fingers breaking.
Making Fabric
When sculpting fabric, laying slabs for fabric over slabs for the body has a high likelihood of cracking. Instead, sculpt the rough shape of the body and garment together, as I did for this voluminous sleeve. I’ve roughly sketched the neckline of the dress on the woman’s torso as a guideline.
Use thin coils added with scoring and slipping to give the folds and drape of fabric. Edges of fabric, like collars and cuffs, can be smoothed on one edge only and the other edge, as it lays over the base slab, will look like the edge of the garment. Use a wood tool or fingertips to smooth these coils into the form and integrate them.
The clay can also be textured to look like fabric. Use rope or burlap and press into the soft clay.
Building the Neck and Chin
When the shoulders and neck truss have had a chance to set up a little and are at least leather hard, continue with the neck and chin. Build the neck as a tube, leaning slightly forward. The chin should be shaped with an upward tilt. Cut a chevron shape and attach to the front of the neck, the point facing where the head will face.
Let the chin set up, again wrapping the top edge with plastic to keep it moist. Once the chin is leather hard, continue adding clay for the face and head.
Once the chin is slightly firmed up, add the face, straight up from the chin. Add clay straight up to roughly where the hairline will start.
Use a stylus to lightly chart where the features will go.
Constructing the Head
Now that the neck and chin have had a chance to firm up you can add the head. Build the face straight up from the chin, joining firmly. Use a coil to seal the seam around the chin.
Close up the back of the head rounder than the face to copy the curve of the skull. Make the facial features before closing up the head.
Making the Eyes
Lightly sketch a “t” on the face as a guide for the placement of features. The eyes will be along the horizontal axis of the t. Press in with the thumbs to make the eye sockets. In the center of the eye socket, push a tool all the way through. Make two matching balls of clay, score and slip them into the eye sockets. Use small coils to make lower lids, then upper lids.Use a wood tool to smooth and shape the creases.
Building the Nose and Mouth
Draw an upside-down T with the crossbar being the bottom of the nose. Cut all the way through the face, then push from inside. Make a coil of clay and add into the T. Use a wood tool to sculpt the nostrils and bridge of the nose. Push out the cheeks at the same time to help form the bridge of the nose.
Use a wood tool or fettling knife to draw the line of the mouth. Use the flat part of the tool to push the lips outward: up for the upper lip, down for the lower. Use a tool to push the corners of the lips in. Lips can also be made with coils, scored and slipped in place and smoothed out.
The eyes of the ermine are made in much the same way as the eyes of the woman, with tiny balls of clay and coils for eyelids. Before placing the eyelids I made the pupils of the ermines eyes with a wood stylus.
Making the Ears
Welcome to AMACO's mini-lesson series: Sculpting the Human Figure. In this series we share The lady’s ears aren’t visible in daVinci’s painting, but I’ve added in an ear to show how they can be made. Using the eyes and mouth as guides, lightly make a line for the top and bottom of the ear. The top of the ear should be slightly above the line of the eyes, and the bottom should be between the tip of the nose and the level of the mouth. Use a coil, scored and slipped and applied in a C-shaped curl, for the ear. Smooth the inner curl of the ear, leaving the outer edge un-smoothed. Use a wood tool to hint at the curve of the inside of the ear. In sculpture, ears work best when they are subtle and close to the head.
Closing the Head and Constructing the Hair
Now that the features are complete it’s time to close up the top of the head. Use slabs to make the top of the head, making it slightly larger than you want it to be on completion. Let the head firm up if it needs to and come back to it later. Shape slabs and score and slip. THe final slab, closing up the top of the head, can be tricky. Once it’s securely attached use a paddle to lightly shape the head. This has the added benefit of compressing the joins to make the seams of the head more secure.
I take a bit of artistic license and make a braid on the back of the lady’s head. The make it I first cut a hole where the braid will be attached, then use a slab to make a hollow tube. Use a scoring tool to roughly make the texture of the braid and hair
In the painting the lady has a circlet across her forehead, I use a coil of clay to represent this.
I use wood tools and my fingers to clean up the figure and indent the lady’s eyes for pupils. Small amounts of clay scored and slipped into place are use to define the brows.
Similar Lesson Plans
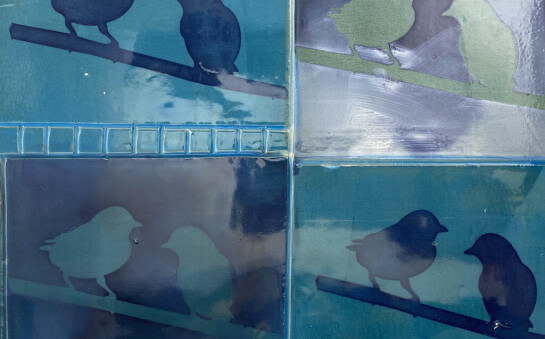
Super Simple Silkscreens: Printing with Underglazes
Help is on the way. In this workshop we will use common craft store materials to make frameless silk-screens to print onto clay.
Learn More
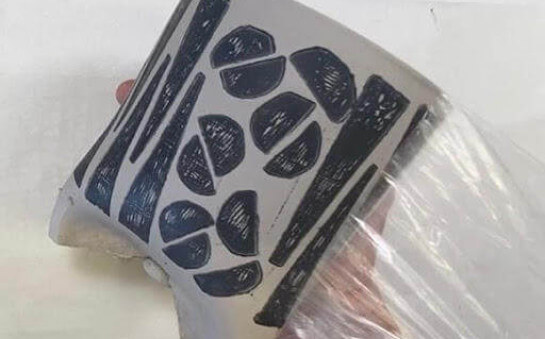
Press & Print on Moist Clay
In this video we demo how to make stamps to print and press on moist clay slabs creating texture and color at the same time. Once your slabs are textured, we demonstrate how to build simple cylinders which can be modified to create a wide variety of forms.
Learn More
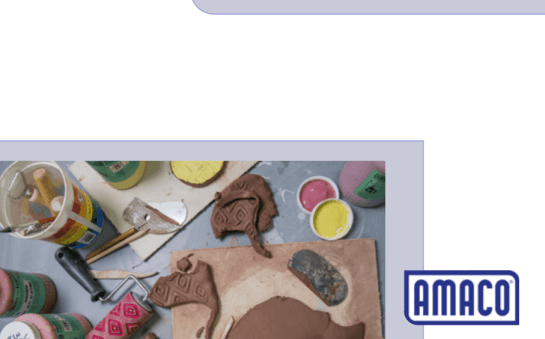
Newbie Clay
NEWBIE CLAY is a brief guide with information to help you start on your clay journey, including video links for making, firing, and glazing your ceramic projects, definitions of common terms in clay, and guidance for choosing your materials.
Learn More