(PC) Potter's Choice
The Potter's Choice glaze series was designed with the potter in mind! These stunning glazes add fluid colors and effects to smooth or textured ware, with optimal results at Cone 5/6. To use these glazes is to step into different ceramic glaze traditions of many cultures throughout history. Check out our PC Layering charts to see all the amazing results you can try in your own studio!
Reduction Effects in Oxidation | Variety of Colors and Surfaces | Cone 5 - 6 | Limitless Layering Combinations!
Cone 5 = 1184°C (at 150°C/hour for the final 100°C of firing) / 2201°F ( at 270°F/hour in the final 200°F of firing)
Cone 6 = 1241°C (at 150°C/hour for the final 100°C of firing) / 2266°F ( at 270°F/hour in the final 200°F of firing)


AMACO
PC-04 Palladium

AMACO
PC-09 Vintage Gold

AMACO
PC-10 June Bug

AMACO
PC-11 Blue Spark


AMACO
PC-15 Satin Oribe


AMACO
PC-17 Honey Flux

AMACO
PC-20 Blue Rutile

AMACO
PC-21 Arctic Blue

AMACO
PC-22 Blue Stone

AMACO
PC-23 Indigo Float


AMACO
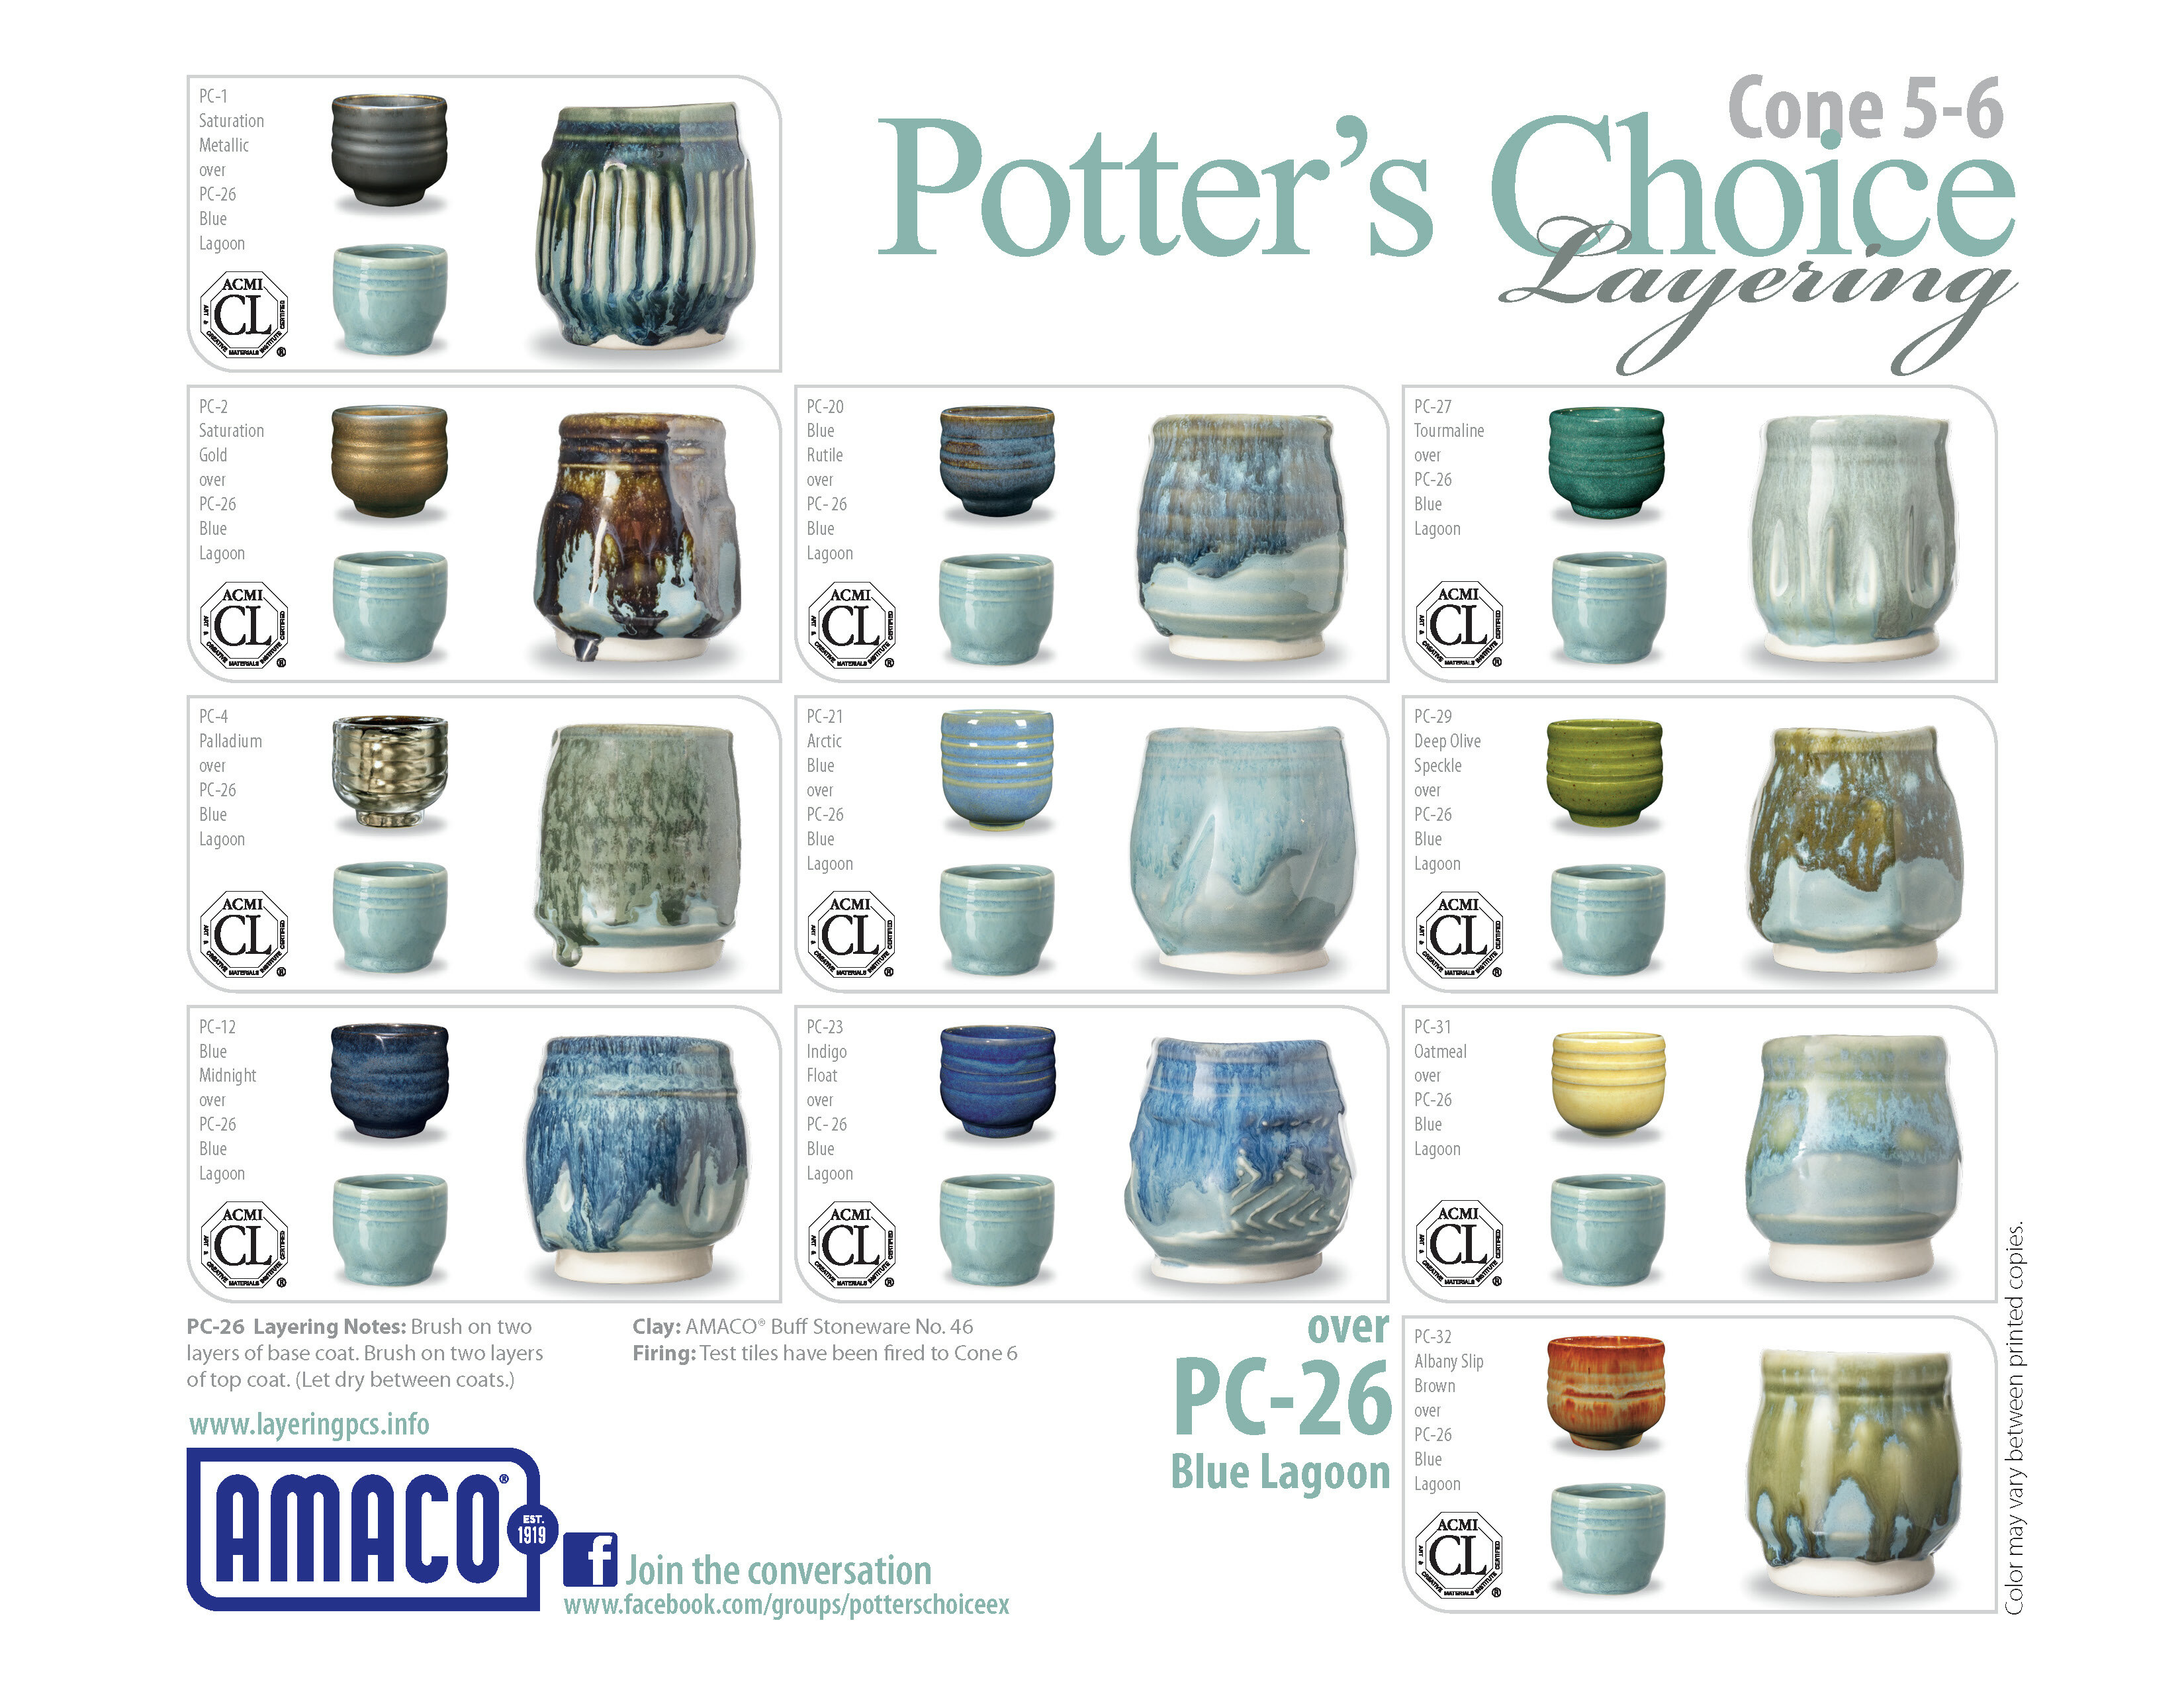
PC-26 Blue Lagoon

AMACO
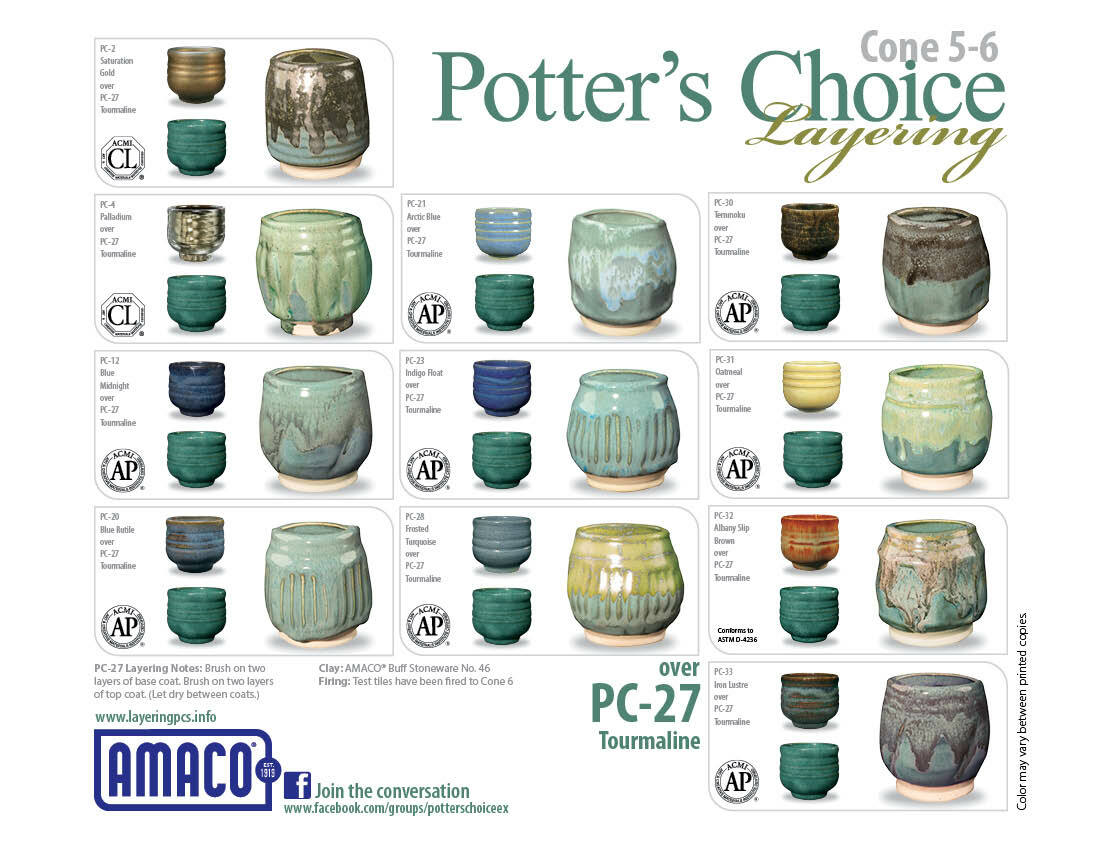
PC-27 Tourmaline


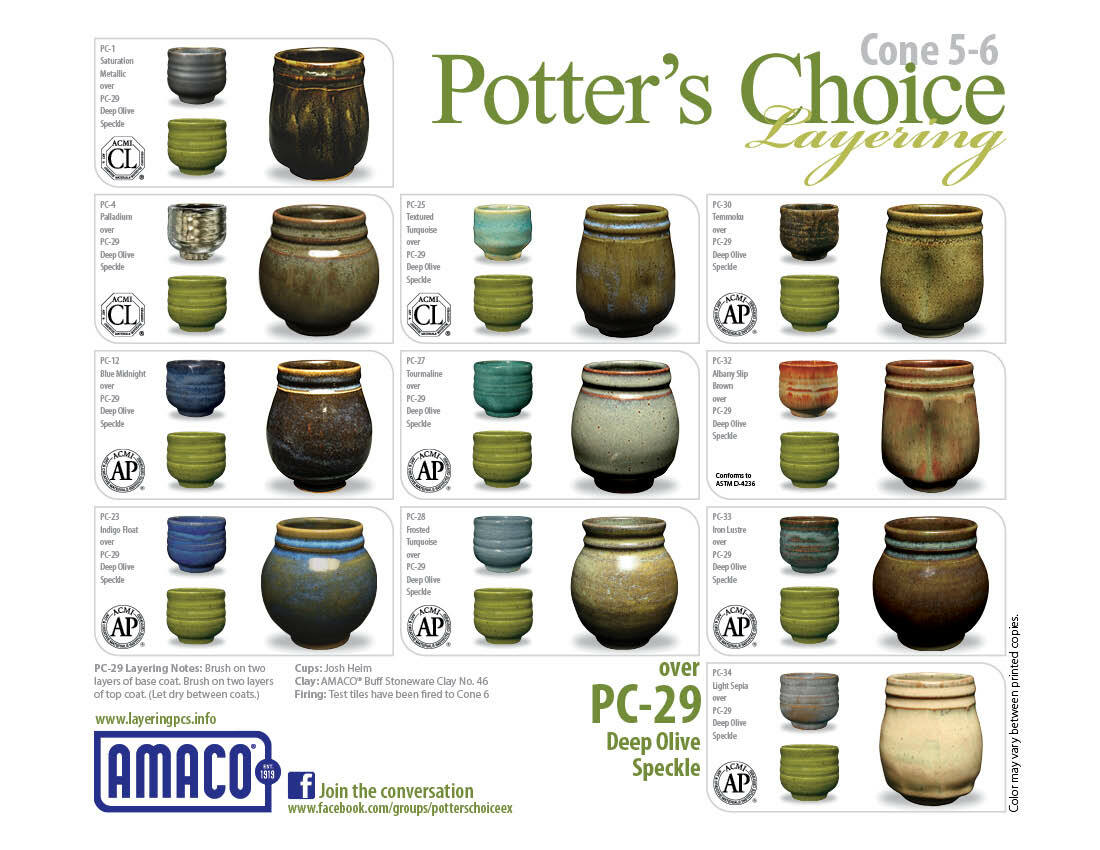
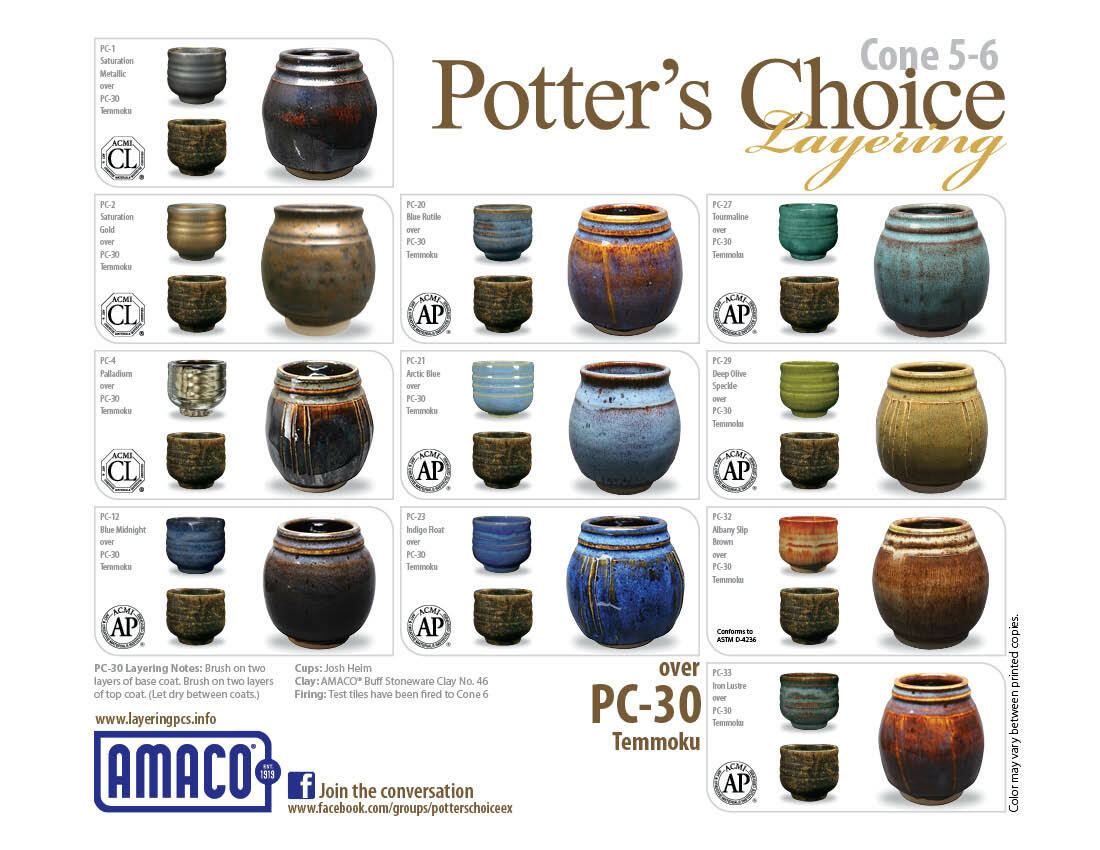
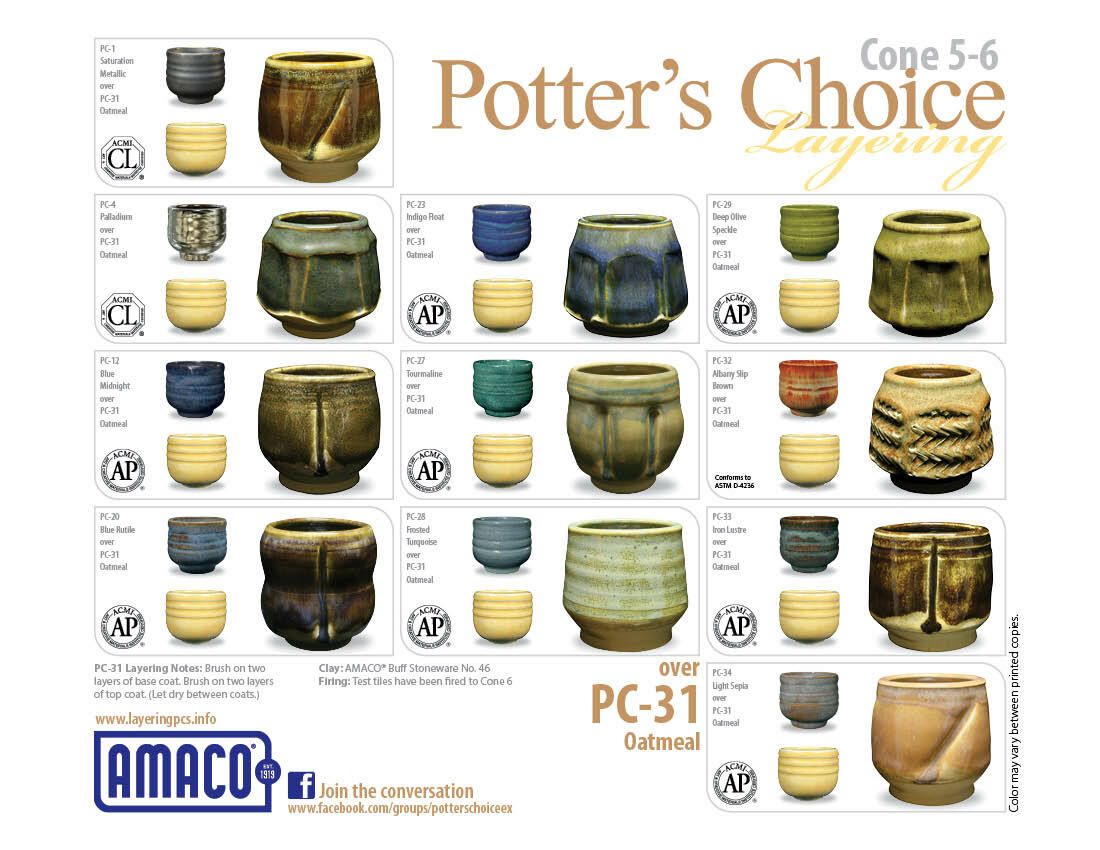
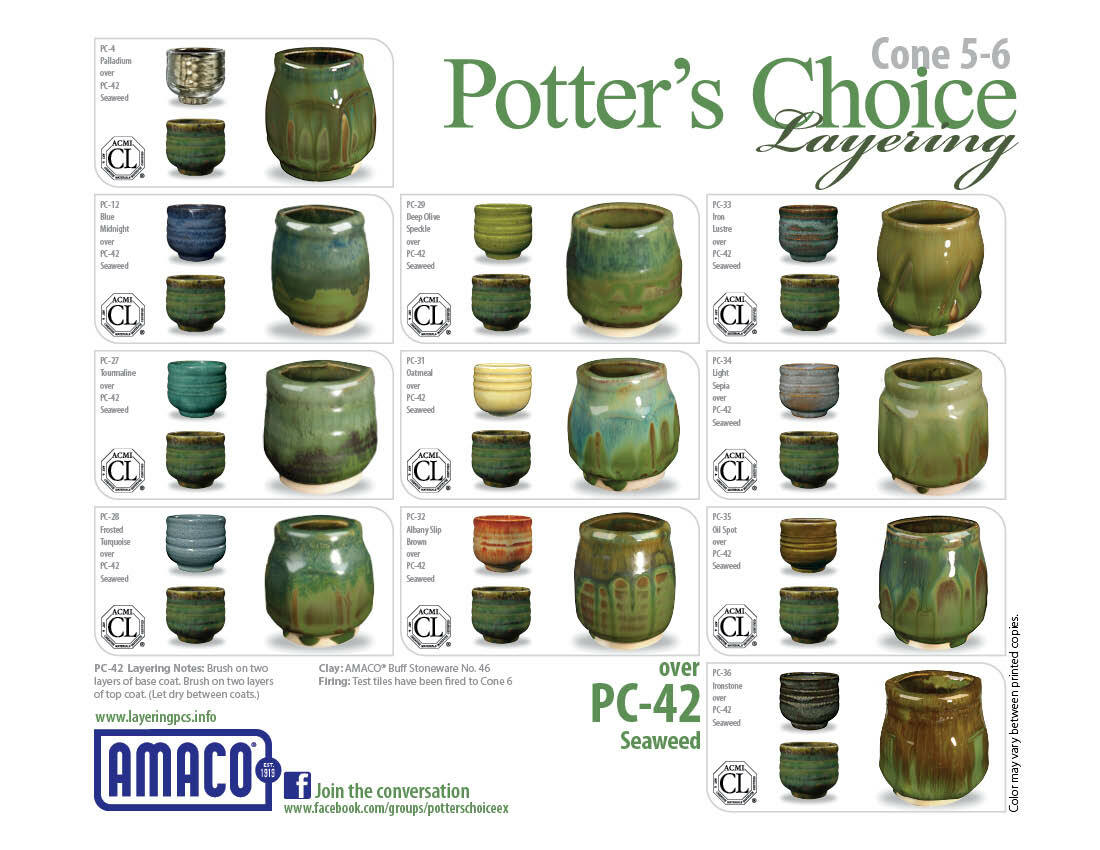
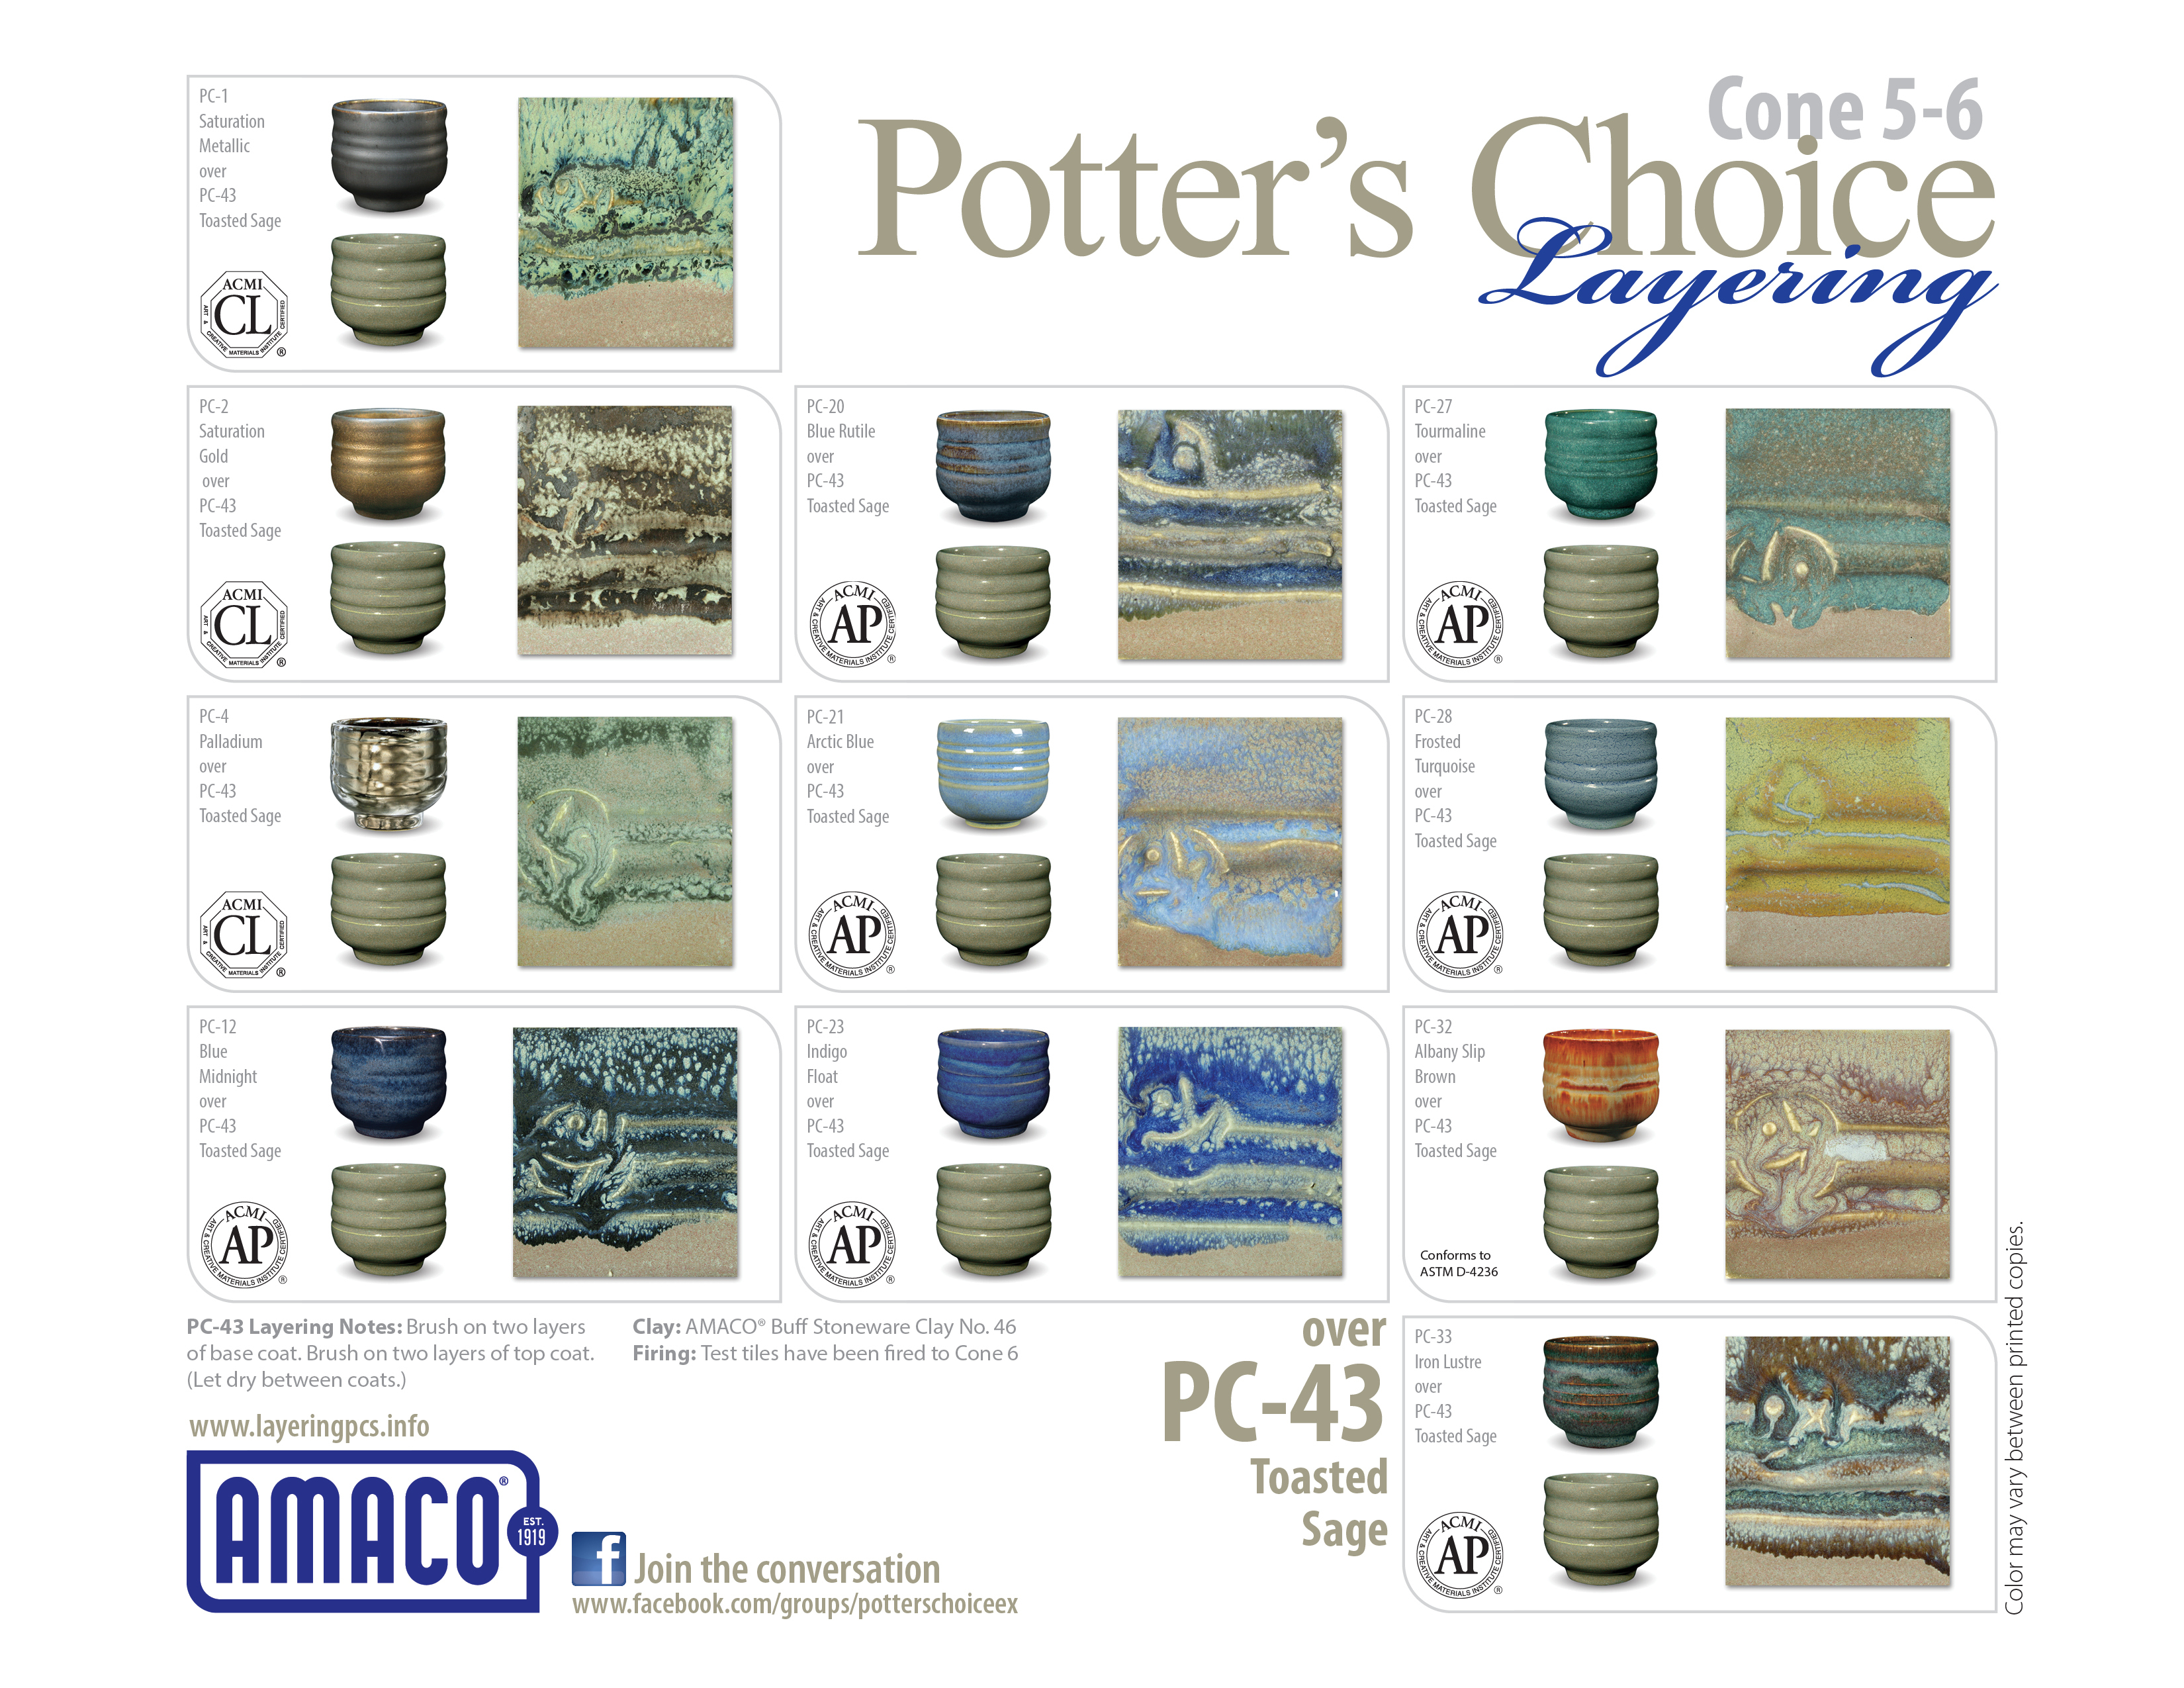
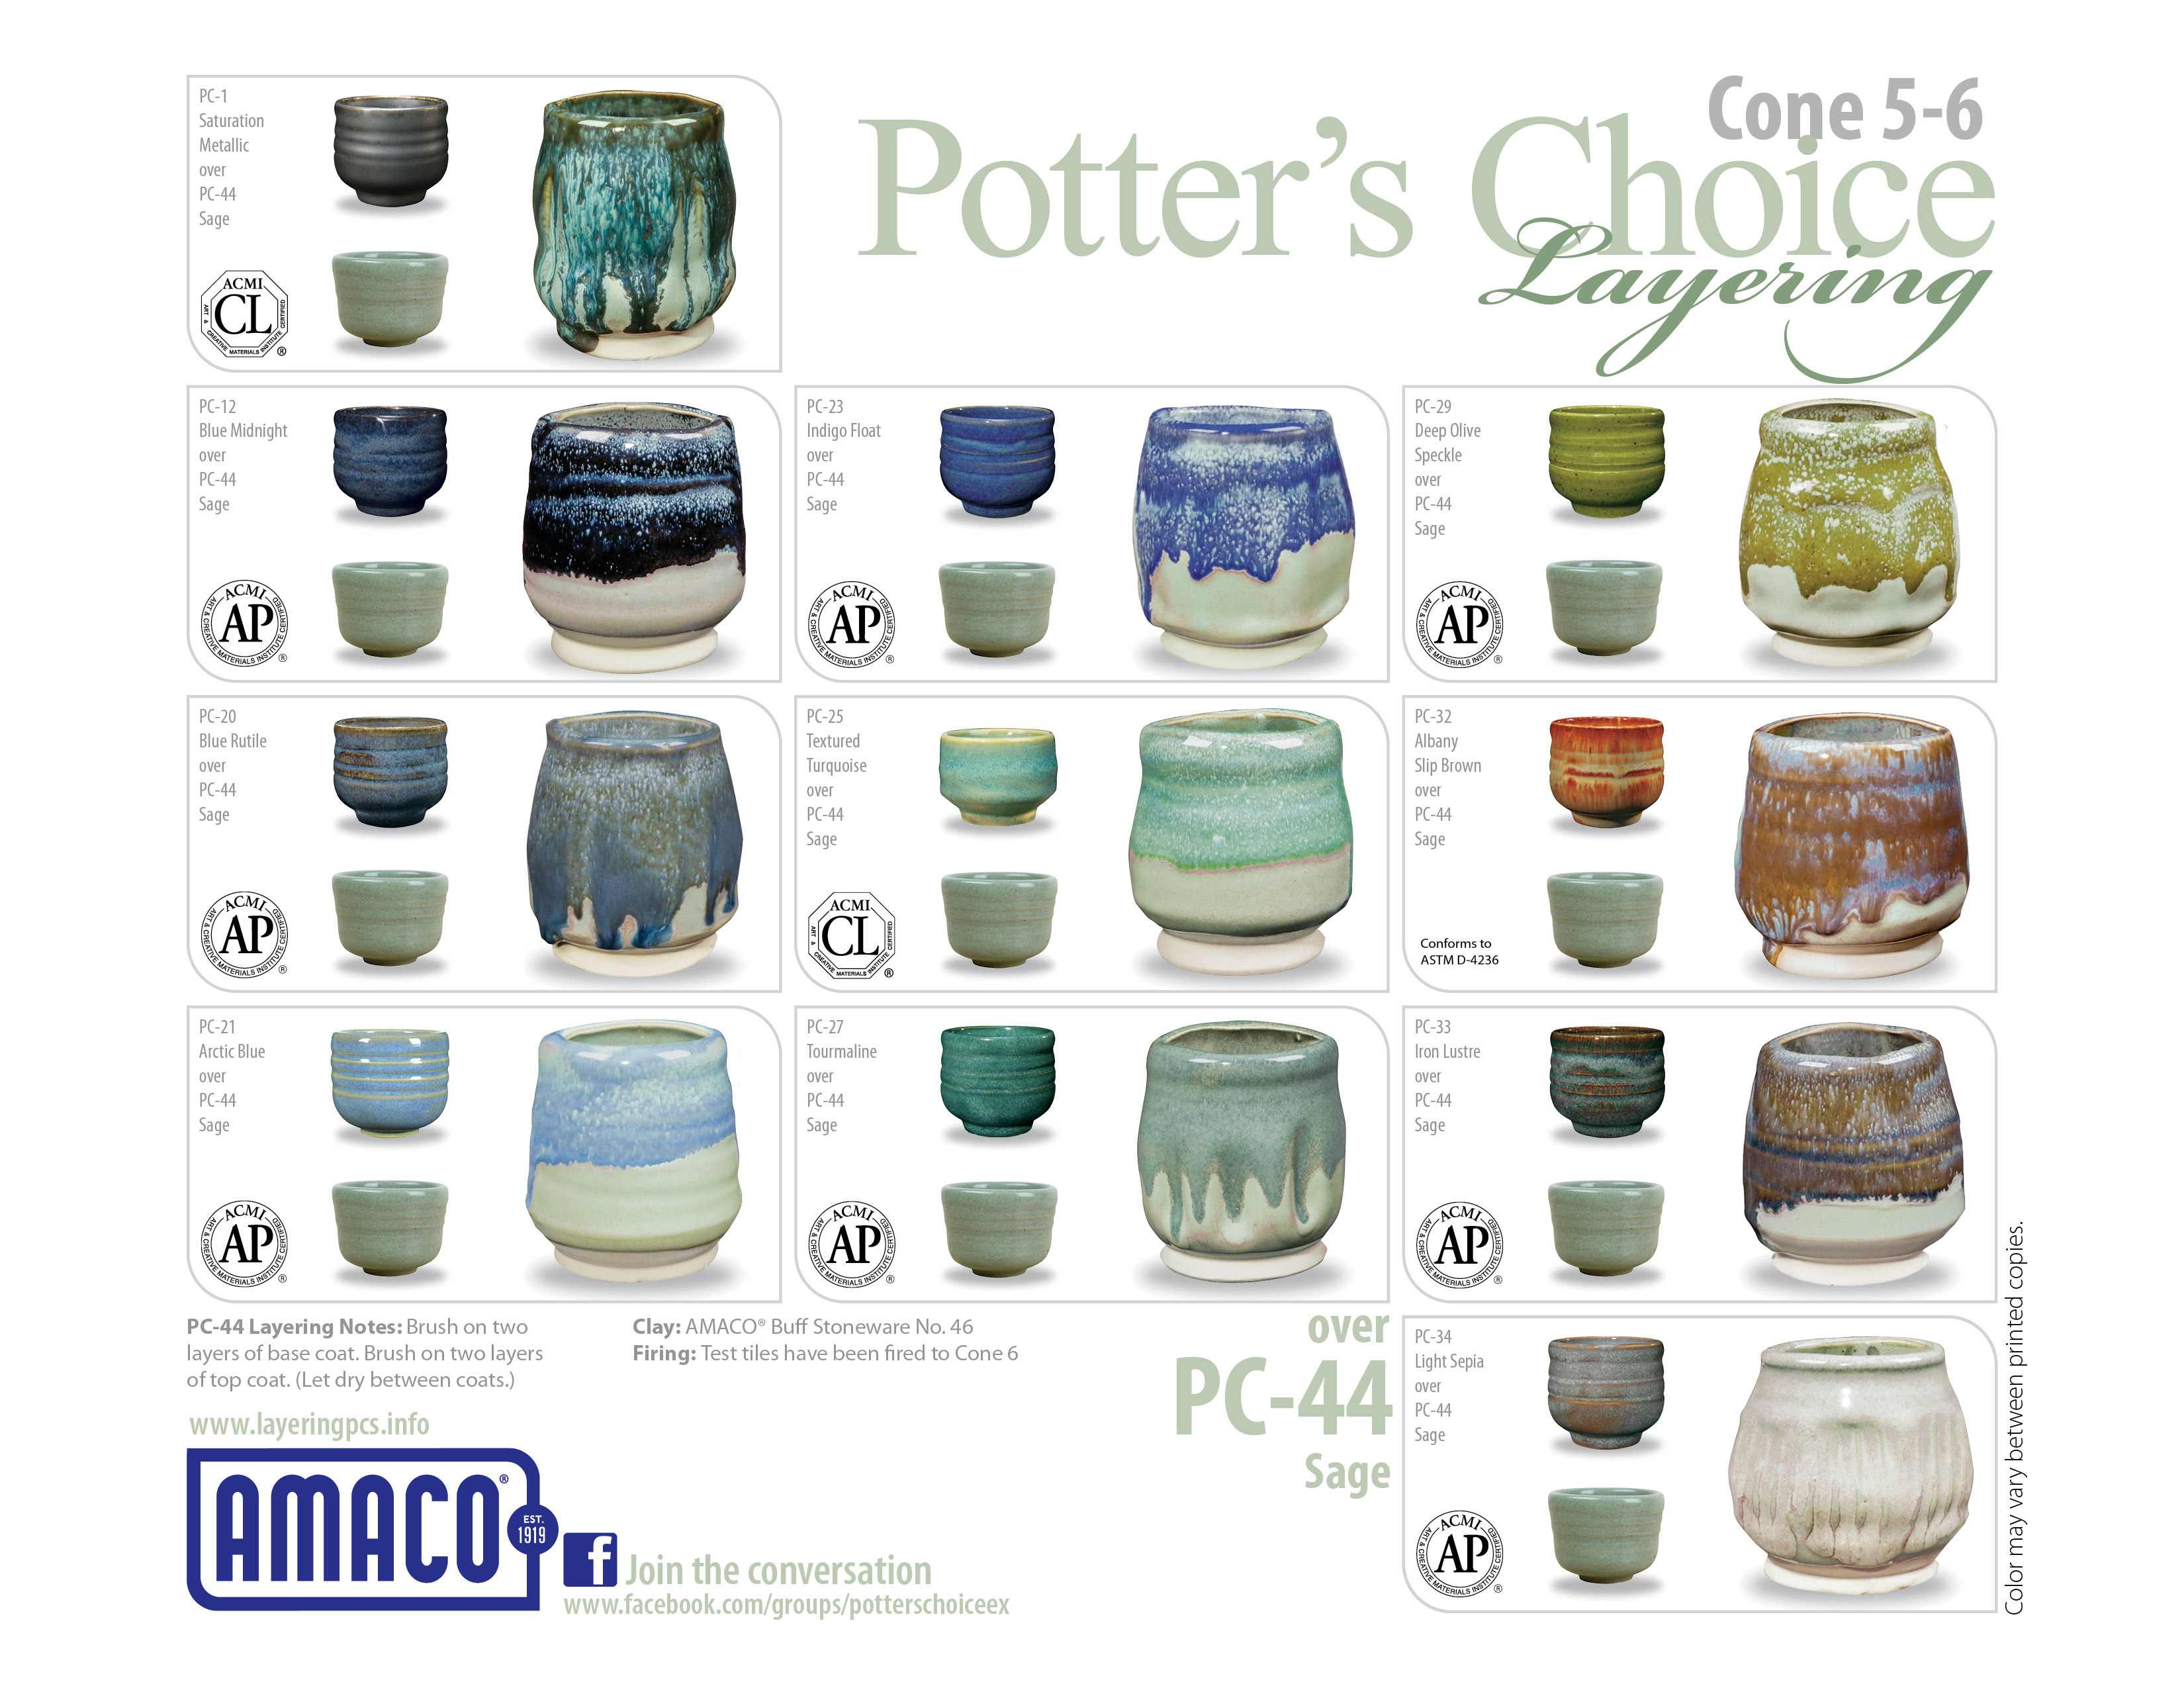
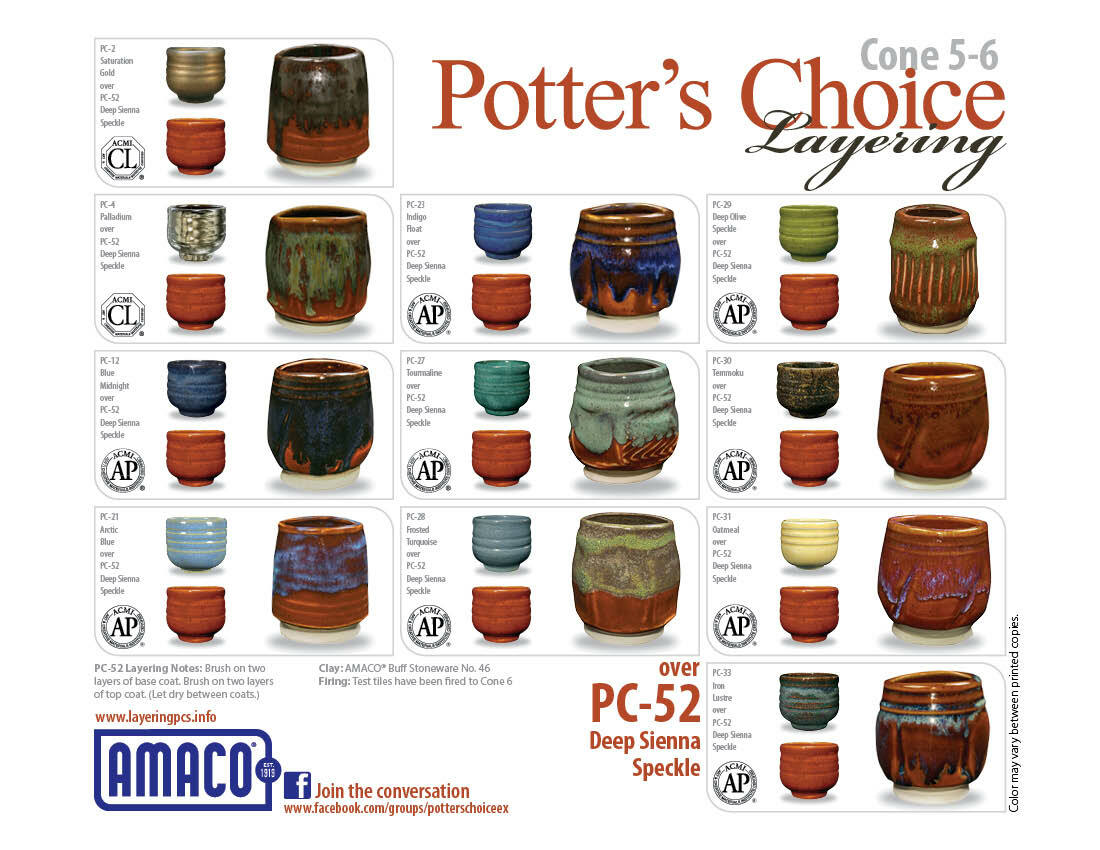
LAYERING WITH POTTER'S CHOICE GLAZES
Click the images below to download the PDF's of the layering sheets.
Please note that some glaze layering tiles may feature discontinued glazes.