
Mimbres Bowls

Celebrate ancient Mimbres artistry using today’s clay and glaze materials in a cross curriculum adventure studying history, culture, clay coil building and glaze decorating techniques. The Mimbres people painted images in black on a white background, mostly on earthenware bowls. Very little beyond pottery has been recovered to learn more about these people, so making an interpretation of the Mimbres culture based on archaeological finds remains highly speculative. What is agreed upon, however, is that between 550 and 1150 C.E. they lived in a 46-mile-long valley in a southwest corner of New Mexico. These peaceful village dwellers farmed, hunted and foraged. They painted on pottery creating images of human figures, rabbits, lizards, fish, antelopes and even bugs from their landscape. A few years ago, I created a line of pottery celebrating the ancient art of the Mimbres people using their 900-year-old decorative motifs. This body of work was originally created for display and sale at the Eiteljorg Museum Store in Indianapolis. The Eiteljorg is dedicated to appreciating and understanding the art, history and culture of the American West, and the indigenous peoples of North America. There are many images in traditional Mimbres decoration and some of those appeared in that line of pottery. In my more recent work, this decorative style progressed into more silhouette-type images from contemporary themes. For example, animal silhouettes—from dogs to chickens—were used as the main image on vessels with Mimbres traditional rim designs. Students can celebrate Mimbres artistry by making it new again on today’s clay.
Supplies List
- AMACO Low-Fire Clay
- AMACO Liquid Underglaze LUG-1 Black
- AMACO Liquid Underglaze LUG-10 White
- AMACO LM-10 Transparent Matte
- Wire Clay Cutter
- Scoring Tool
- Glaze Brushes
- Vinegar
- Sketch Book and paper
- Pencils (regular graphite)

Create the Base
Roll coils of clay and shape a medallion of clay for the base and begin to attach coils.
Optional: Use an Extruder
Use a brent® Clay Extruder for coils of clay instead of rolling coils.
Build with Coils
Continue making coils and attaching them by scoring and gluing with vinegar.
Apply Vinegar between Coils
Continue scoring and using vinegar as glue with each added coil.
Blend the Coils
Smooth coils to attach and to create surface to decorate.
Build Up the Bowl Form
Add coils until the bowl is approximately 5 inches across by 3 inches high.
Smooth Inside Coils
Smooth coils on inside.
Smooth Outside Coils
Smooth coils on outside
Finish the Rim
Smooth and compress rim.
Apply White Underglaze
Paint white underglaze on outside and inside of red clay bowl and let dry. This step is not needed if using white clay.
Transfer Your Design
Cut out sketched design and trace using a pencil (pencil line will fire out).
Paint with Black Underglaze
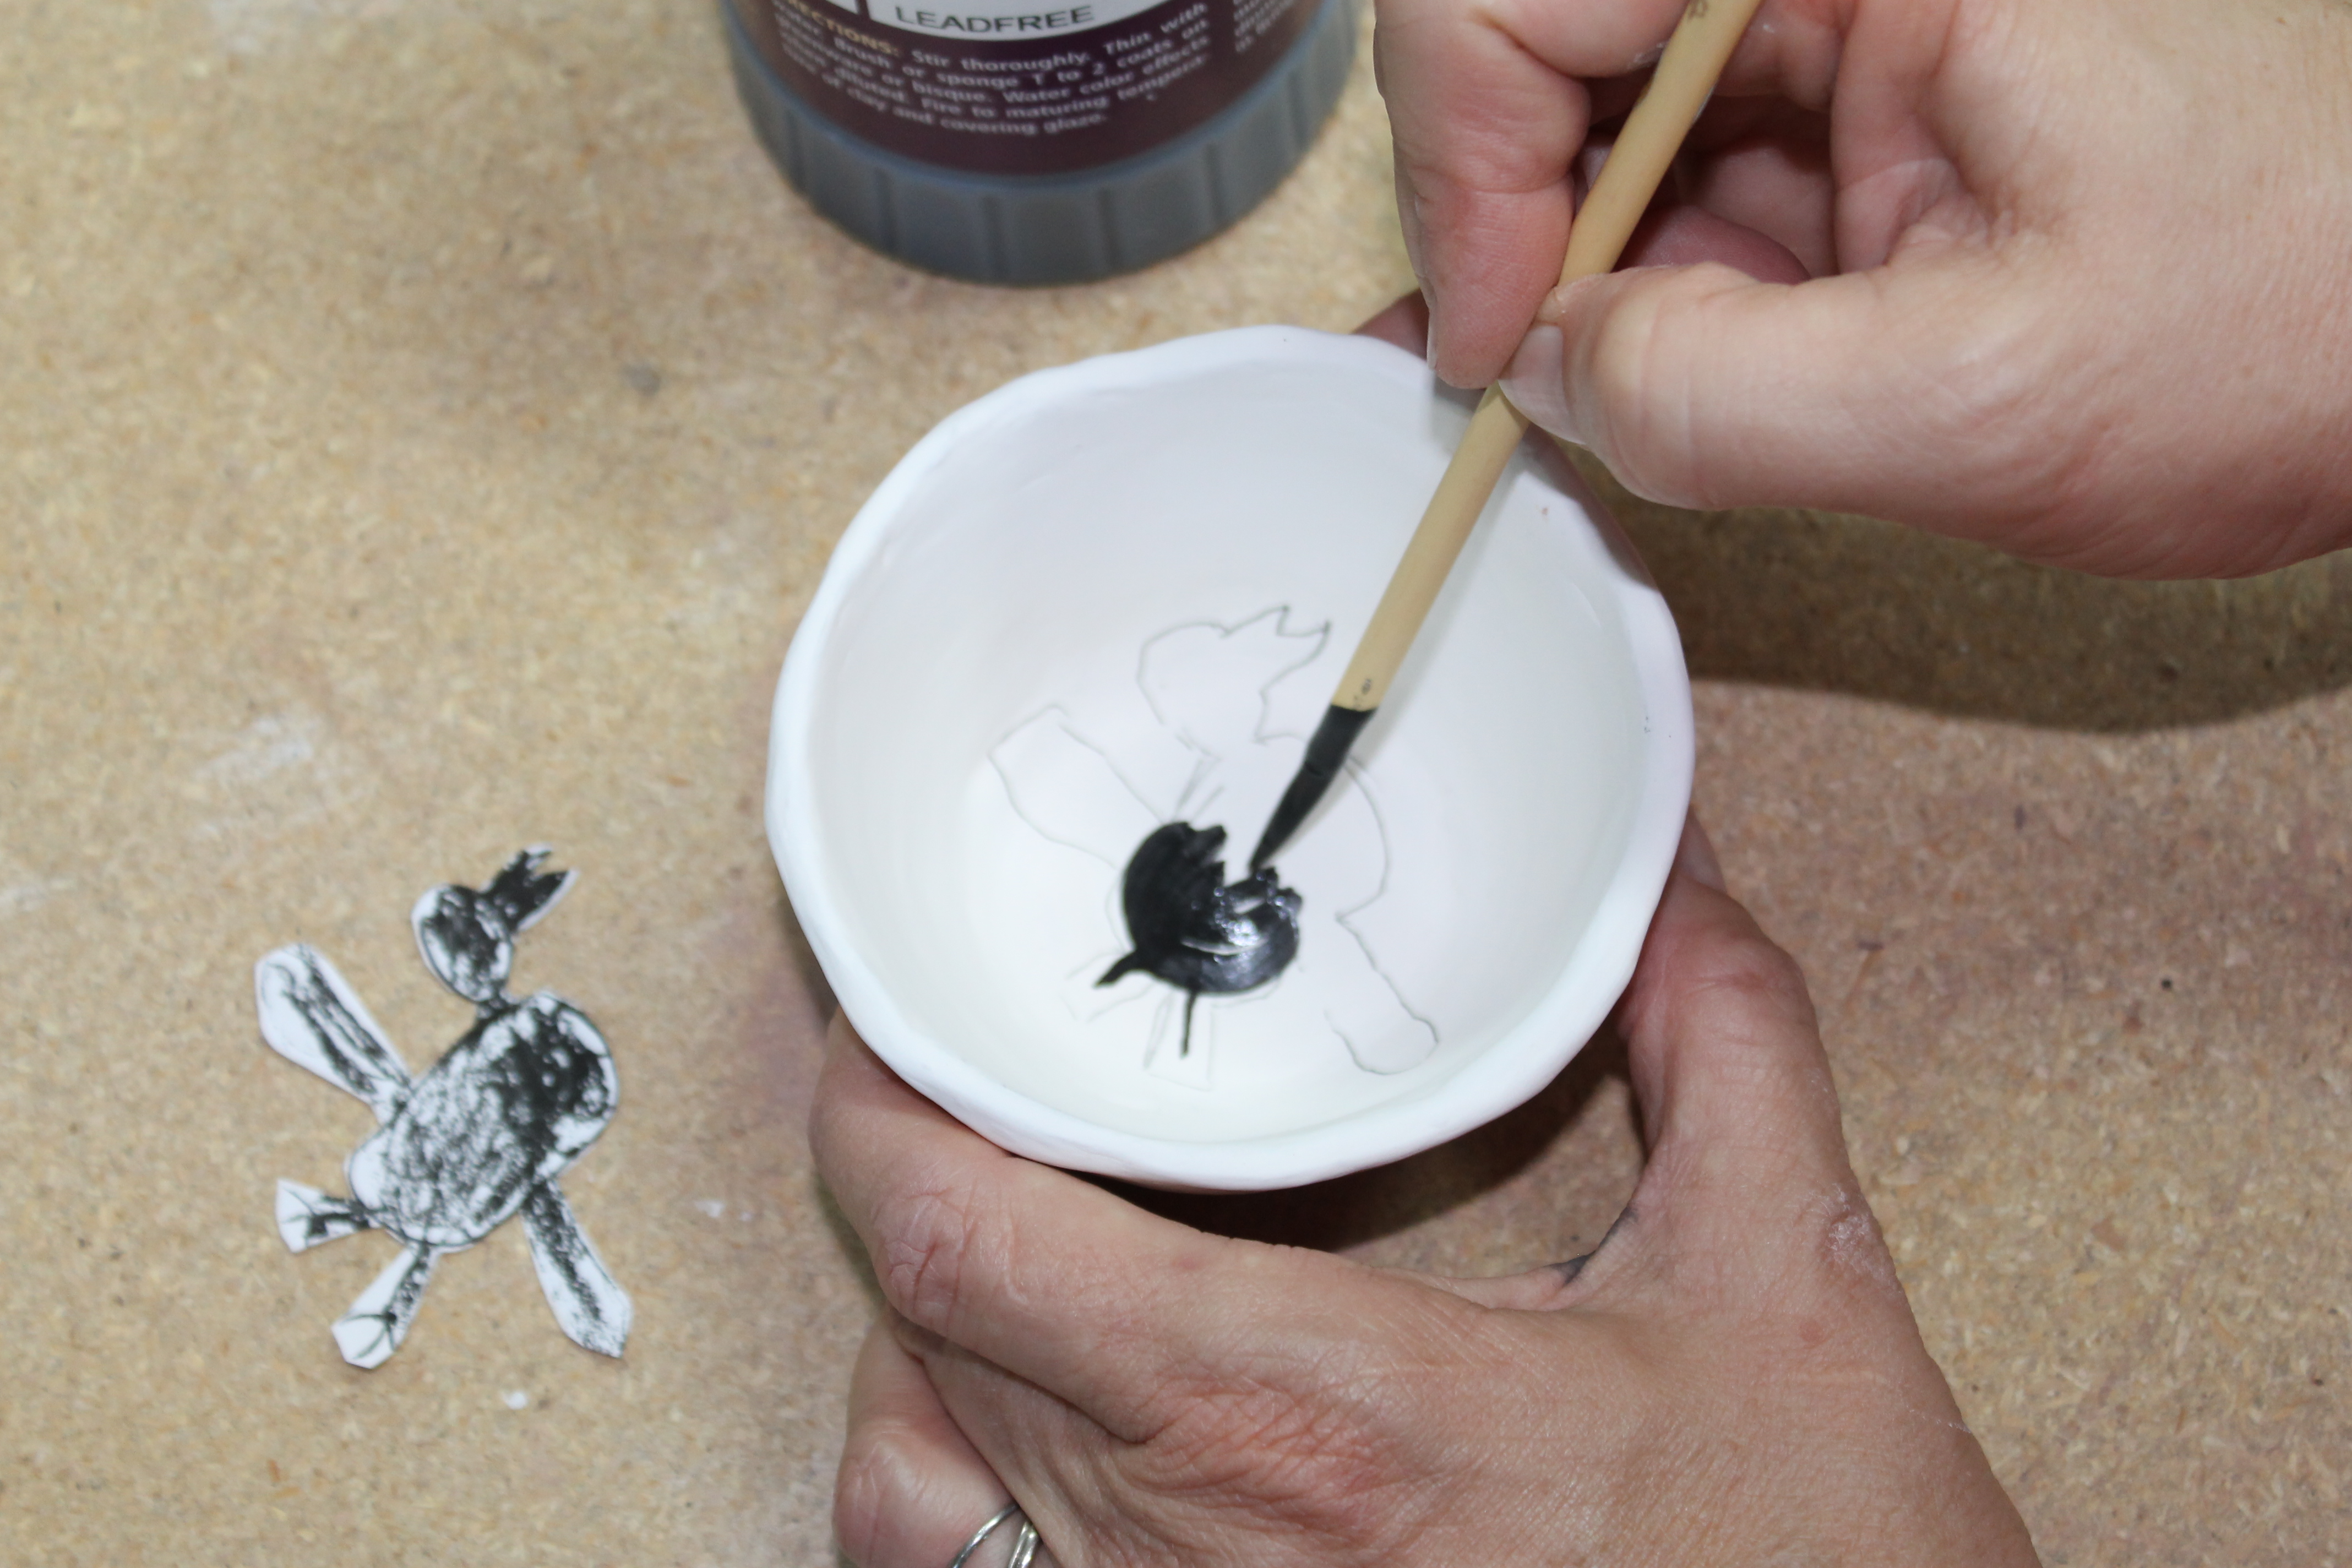
Paint black underglaze using a detail brush.
Create Patterns
Paint lines using a dagger/striper brush with underglaze.
Finishing and Firing
Make sure underglaze and clay is completely dry before firing to Cone 04. Mimbres decoration bowl could be finished here. For functional, food safe bowl, brush LM-10 Transparent glaze onto bisque fired bowl and do a low fire glaze firing.
Video: Supplies
Video: Mimbres Construction
Video: Mimbres Decoration
Similar Lesson Plans

