Traveling Tokens

Through mold making processes, students will make multiples of a uniquely designed clay token of personal value to be shared with the community. Students will compare and contrast themes and imagery from a variety of social, protest and pop artists. Students will also discuss symbolism in art as they develop their original designs.

Introduction
Art can be found all around us. Generate a list of ideas on where you or your group have seen artwork outside of a museum or gallery setting. What purpose did this art serve? See what answers arise and generate a list of all ideas. What you saw may have been social art.
Now that you have more information do you have any other ideas on where positive social artwork exists? Do you remember what kinds of images you saw? If in a group- take turns answering.
Next, see coins through the online site. Looking at pop-art, protest art and examples of other cultural arts to examine what images you find most useful in order to help communicate your ideas, then you will be designing your own clay tokens to share with others.
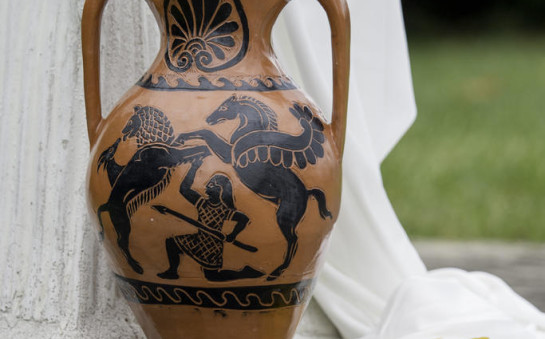
See Roadsworth’s street paintings, Shepard Fairey’s icon posters and Isakari Umuhire murals. All three are different types of social art.
Answer the following to brainstorm your ideas: What and/or who is being shown? What specifically is happening? Is the image real or abstract? How can you tell?
Image borrowed from: https://www.icaf.org/.
Sketching
Take a few minutes to jot down any ideas or images you connected with on a personal level.
Generate a list of the ideas.
Try answering the following: What do you value as an individual, an American, a young man/woman, an immigrant etc. Write you responses on a sheet of paper (ex. honor, trust, health, compassion). If in a group, discuss what is similar, surprising, profound from the list of volunteers?
Select the top three personal values you believe in to begin brainstorming your design.
Brainstorming Cont.
See the Humanitarian and Cultural coins of the U.S. Mint online. See which you find most captivating and begin analyzing them. Ask yourself, What event/icon/image is being shown? What message or big ideas do I think of when we see these same characters or events and what might these represent?
Think/discuss how the layers used form the image and the narratives you see. Continue brainstorming ideas through drawings.
Final Sketch
Narrow down your ideas to two personal values. Take the next 15-20 minutes to draw out your ideas for those two different values. You will need to include the following in your sketch: A. Clues and visuals that support your ideas, B. A composition that seems complete and considers the round shape of your token.
Start with a circle about 2” in diameter and then draw in your image. Tracing paper can be used to help draw details.
Modeling
With plexiglass and oil-based clay, create a relief image by adding layers. Mold a 1/4” thick round clay disc and secure this to the Plexiglas, pushing down. Add layers from background to foreground until the full image is developed. Your layering will encourage your viewer to feel the image as well as see it. Use flat, round and angled tools to smooth edges and flatten surfaces evenly. You can use a magnifying glass to create details.
Use tools to begin developing your design on your oil-based clay circle. Break to reflect on progress.
Casting
Once your oil based clay token is complete, you will be pouring a material called plaster over your model to make your mold. Once poured, your plaster will become hard and set in 1-2 hours. Note: Your token should be well secure to Plexiglas before pouring your mold.
Before pouring your mold, make sure that all exterior edges of your token model are rounded and angled inwards so that the mold form will be able to lift up avoiding undercuts (one suggestions is to draw an image of your mold and demo model to visualize how the process works.
Get plastic gloves and a mask (plaster dust is a contaminant, mask is a safety precaution)
Pour cold water halfway into a yogurt cup (for only one mold- a large bowl can be used if doing multiples.)
Add plaster until a peak forms in the center.
Mix thoroughly for 3-5 minutes until you see a thick yogurt consistency.
Tap yogurt cup on the table to remove air pockets.
Pour mixture slowly over surface of oil-based clay.
Remove any remaining air pockets by gently tapping the plaster on the table (use only a little pressure to avoid plaster from thinning.)
Note: once plaster is poured it cannot be moved until it dries.
To avoid breaks in your mold, your plaster should be no thinner than .5” thick.
Reminder: Wear a mask and use gloves when mixing plaster. All plaster must be thrown away to avoid clogging sinks.
Traveling Q's
Think back to your original project goal of sharing a personal value with others through a social art project. Once you have your mold made you can begin to make individual tokens. Consider what will you do to your physical tokens to help them travel or be exchanged from person to person?
Record your (or the groups) suggestions. Ideas: You can post your tokens online on the Travelingtokens.com website and share them with others, or if you prefer, we can share them through our own social media or another agreed upon platform. Each token can receive a QR code and/or a hashtag to describe its meaning and alert the person receiving the token to take a picture with it to share with their online community.
You can add the words, “Get & Give” to show how the token is meant to be passed from person to person. Generate a list of ideas you think would support the strongest approach to sharing. allowing tokens to travel from one person to the next.
You can make your own stamp - similar to how you are making your own tokens or print a stamp through a CAD machine or online through a stamp making company.
You can engrave letters and symbols such as the Instagram logo with a clay tool or write the character or value you are looking to present on the front or back if you feel it is needed.
The image and website along with a statement when passing the token was voted as one of the best ways to communicate an idea.
Notes about the Website: The website is linked to an Instagram with postings visible on “TravelingTokens”. The site supports students' blogs to post and receive comments.
Token Making
Once your presentation decisions are made, you will stamp and clean-up the edges of your clay tokens.
Begin by pulling the oil-based clay out of the mold form by either simply lifting the mold off of the Plexiglas sheet to expose the original form or by taking a curved tool and prying the oil-clay out of the mold. Be sure that no residual oil-based clay remains in the mold.
Next, follow the steps using the plaster mold and ceramic clay. 1. Roll out a soft ball of clay approximately the size of your oil-based clay, 2. Smooth this clay so that it contains no cracks or creases, 3. Press clay into mold pushing down evenly, 4. Even out surface with water or fingertips or a hard rib scraped over top of clay with minimal pressure, 5. Stamp into clay token and engrave designs as needed, 6. Blow dry clay form in mold or let set for 5 minutes, 7. Using soft clay that is slightly sticky due to water put clay into coin and in the same motion pull backwards. Token should release from mold. If it does not release easily, repeat step 6.
(Handout copies of the steps listed to any group members.) Take time to practice the techniques demonstrated, finish refining the forms or making plaster molds. Check for undercuts or issues in plaster molds while working.
Glazing
Sketch out your desired color scheme based on the imagery you designed. Think about how individual personal values can be made clearer through the color choices and glazes used. Consider how you can make glazing more efficient and effective when painting 10 tokens at a time.
Suggestion: You may stain the backs of your clay tokens with a combination of gloss glaze and underglaze to darken embossed/ stamped designs. A sponge to the surface of the token will remove excess color.
Note: Be sure to wipe off bisque fired works before glazing them. If kiln use is not available, cold acrylic paints can be used to color works.
Finish
Once all works are glazed and in the kiln, think about the impact you will have as your work is passed around and your ideas and actions are shared. You are empowering yourself or your group as social artists while at the same time helping to make your community a better place.
Complete this unit project by posting images of tokens and their meanings throughout your community.
Presentation option: Develop an artist statement that describes your token’s message and where your ideas come from. Send this statement to travelingtokens.com and/or publish articles about your work in the local paper, T.V. Channel or online to share with others.
Similar Lesson Plans